Thursday, October 22, 2009

A Nation of Farmers: Guess what book I'm buying now.

This looks like a book that belongs on the shelf of every revolutionary farmer.

内容:

"A Nation of Farmers: How City Farmers, Backyard Chicken Enthusiasts, Victory Gardeners, Small Family Farms, Kids in Edible Schoolyards, Cooks in Their Kitchens, and Passionate Eaters Everywhere Can Overthrow Our Destructive Industrial Agriculture, and Give Us Hope for Life, Liberty and the Pursuit of Happiness in a Changing World."
- Civil Eats » Blog Archive » A Nation of Farmers: A Handbook for Food System RevolutionariesGoogle サイドウィキで表示

Monday, October 12, 2009

Yoi To Make

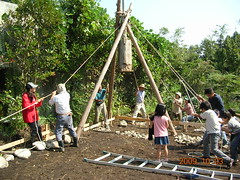
This is a video version of the stills below. You can see how the pile driver works and hear the work song that goes along with it. There are several versions of this song, some of the quite ribald, so it was always fun, even though the work was hard.

Saturday, October 10, 2009

One foundation stone


one foundation stone
Originally uploaded by touzanka
This is one completed pile with the stone planted. One beam will sit on top of this stone.

Group Pull3


group pull3
Originally uploaded by touzanka
Another shot of the thumper ready to drop.

Notice the pile of stones that will be pounded down.

Group Pull4


group pull4
Originally uploaded by touzanka
Log up in the air, ready to drop.

Ropes-n-pullies


ropesnpullies
Originally uploaded by touzanka
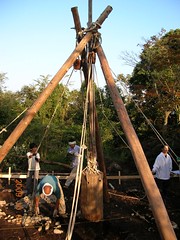
This is how the pile driver looks when it's ready to go. We all grab a rope, haul the thumper up, and let it drop. All to the rhythm of the singer, the owner of the house, who has done his best to remember the yoi to make song, a great work song.

Foundation guide


found guide
Originally uploaded by touzanka
This is a photo of the guide for the foundation of the house. There are markings on the boards which form a grid helping us determine where each of the piles should be placed. In the forground is a pile of rocks that will form the piles.

Yoi To Make stomper


log
Originally uploaded by touzanka
This is the business end of the Yoi To Make. It is a 100 kilogram pine log attached to the tripod with pullies and ropes to lift it off the ground and drop it onto a pile of rocks.

This forms the foundation for one beam of the house.

Saturday, September 12, 2009

inner wall


inwall
Originally uploaded by touzanka
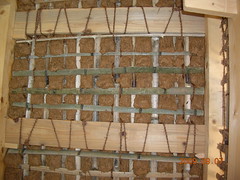
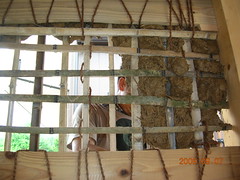
The wall on the right is the covered wall, and that on the left is what a section looks like before it's covered from the inside. The gap at the bottom is a window.

innnerwall 2


inwall2
Originally uploaded by touzanka
You can see the difference in the color of the mud. The brown on the left is the older mud. That on the right is the newer mud.

outwall


outwall
Originally uploaded by touzanka
This is the dried outer wall. Lots of daylight getting through here.

More on mud walls

Since the outside half of our mud walls was up dry, thanks to the terrific weather, we put up the inside half on Thursday. Again with the help of seven other hard working friends, we got the job done in one day. Thursday's work went smoother for three of reasons, we had more practice, the outside wall gave us something to push against, and the new mud was easier to apply.

We started at 9:30 by mixing up the little bit of mud we had left, and uncovering the new load of mud we received for the remainder of the walls. The old mud had gotten harder, because the weather had been unusually dry and windy. The new mud, having been covered with plastic, was ready to go.

The inside walls went up much easier than the first time. The first reason was that all of us had experience at it. Also, since the outside wall was already done and the big gaps in the bamboo lattice were filled up, the new mud went on much smoother. Finally, the straw in the new mud had been chopped up finer and had rotted longer, so it was easier to spread. The smell was quite a bit stronger, too.

One other interesting feature of the different mud is the color. The mud we used on the outside of the building was from a nearby source, and is tan in color. The newer mud is chocolate mousse color. You can see that in the photos.

We will cover the walls once more with a thin layer of mud with a higher sand content for the sake of appearance and making it varmint proof. Now there are lots of gaps in it as a result of the mud drying. Sandier mud won't crack as much.

Tuesday, September 08, 2009

Mud supply


dwindling mud
Originally uploaded by touzanka
Actually, this isn't enough mud, and to finish up the inside walls, we are going to have to find some to buy. There aren't many, but people do still make mud for wall commercially.

Gradually working your way down


from the inside
Originally uploaded by touzanka

From the inside


frominside2
Originally uploaded by touzanka
This is what the wall looks like from the inside.

Looks and smells bad


looksbadsmellsbad
Originally uploaded by touzanka
Smells nearly as bad as it looks.

The west side story


onedown
Originally uploaded by touzanka
The west side of the kura is finished.

Start at the top


start@top
Originally uploaded by touzanka
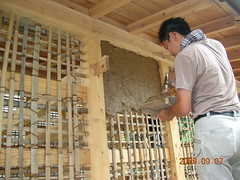
This is the first section completed.

Mud and straw walls: Putting the mud on the latice work

There are pockets of Japan where you can still see what it may have been like to live here as a common person 150 or 200 years ago, and those areas are pretty much anywhere you go. You don't have to go anywhere special, just walk around enough to find those places.

Some ways to you can tell you have found that kind of place is by narrow roads. Roads didn't have to be very wide for people to pass, or a horse, or a pull cart. Thatched roofs, or more likely thatched roofs covered with galvanized steel sheeting is another. My favorite old structures have been kura, or store houses.

Kura vary in size, but they all have very thick walls, which are white on the outside, with thick metal doors and windows. They are often adorned with carved plaster reliefs of storks, tortoises, or some other auspicious animals. And aside from the wooden frame, and steel doors, they are almost entirely mud and straw.

I always admired those structures and wanted one, but thought I would have to buy and old one. I never thought I would be building my own. It has been quite an adventure.

Yesterday we put up the mud on the bamboo lattice walls. The mud has been sitting in our back yard, with the rice straw gradually rotting and forming a fine fiber net that will hold the mud together for decades, and then when my kids or grandkids want to redo the walls, all they have to do is pull down the old mud, mix it with a little new mud and straw, and put it up again. 100% recyclable.

We started at about 9am, wading through the stinking mud to mix it up and adjust the consistency. The straw rots and smells like a swamp, which is really what it was. The bacteria comes from the straw, and is the same strain that helps turn soy beans into natto.

At around 10 we started applying the mud to the walls. Your loader loads a football sized glob onto your pallet, and you throw it into place and spread it out as evenly as possible with your trowel. Then you reach down for another glob that your loader serves up to you with a miniature pitchfork, especially designed for the purpose.

You keep that up, working your way down the wall, until you reach the earthen floor, and then move on to the next section. People reported various symptoms of overworked muscles, twitching biceps, shoulders that wouldn't raise anymore, hands that couldn't grip a trowel or pallet. The smell you get used to.

Traditionally you started applying mud from the inside, then wait a few days for the mud to dry a little, and then apply the outside wall. Our kura has relatively thick horizontal beams on the inside, so we used them as a shelf for the mud to sit on and started from the outside. We will wait for a few days and the apply mud for the inside.

It was a thoroughly enjoyable process, mostly because of the people who gathered to help us out. There were ten people in total who contributed their time and labor, which makes the building all the more dear. They all came for different reasons, mostly to help us or to find out how to make a mud-walled building.

That kind of communal work party is called a yui, 結い、in Japanese, and were common when people planted, harvested or built buildings. My guess is that in the future we'll have more of them, because the people who came to help all expressed a desire to have their own kura, with a couple of people saying they wanted a home or business build that way.


Sunday, August 30, 2009

finished umeboshi


finished umeboshi
Originally uploaded by touzanka
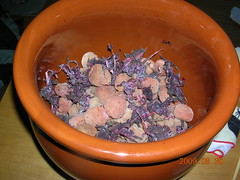
This is a photo of what your finished umeboshi will look like. The faint white powder is the dried salt. Sour and salty, my mouth is already watering.

Ode to the umeboshi: How to make them yourself

Oh, the humble umeboshi.
Your wrinkly pink skin is so devine,
Your sour salty flesh so alkaline,
In winter does your yangness invigorate,
In summer do your electrolytes rejuvenate.
Illness extinguishes appetite,
Rice gruel with umeboshi and soysauce makes it right.
Sour stomachs may cause us misery hard to endure,
Only tea with you and soysauce can cure.
So here is to you umeboshi,
Simple and common,
Remedy to10,000 illnesses summon.

Not brilliant poetry, and umeboshi is worthy of much better, but you get the idea.

I wrote today as my wife put up 207 umeboshi that she has been doctoring along for two months. This is her approximate recipe. (She cobbled together ideas from here and there to make hers.

Ingredients: at least one kilogram of ume fruit (Ume is a fruit like an apricot.), 180g of salt per kilo of fruit, 500g of salted red beef steak leaf or perilla.

1. Wash the ume in water, removing stems, leaves and throwing out bug-eaten fruit. Completely drain water off of the fruit.
2. Put the fruit into a crock or large jar and pour the salt on top of the fruit, covering it evenly. (Some recipes call for a layered approach, fruit and salt alternating.)
3. cover with a lid that covers the fruit, but not the opening of the jar, and then put a weight on top of the lid. The weight should be about 2 kilos, and this should gently press the fruit and salt together. Leave this for anywhere from five days to a month. (recipes vary)
4. At the end of this period there will be a yellowish liquid called "white ume vinegar." Keep it out and add the shiso. Again, recipes vary. You can leave it on top or layer it in with the ume. Then pour in the white ume vinegar, put on the lid with the weight, and let sit for another 20 days.
5. After that time, remove the pickled ume and shiso from the jar and lay them out on a large wooden or bamboo tray. (The liquid will now be called "shiso ume vinegar." It is good as a substitute for vinegar in salad dressings and other places where you may want to use a fruity vinegar.) They should barely be touching each other, and the shiso should be evenly and thinly spread. Put this out in the sun to dry for 3 to 4 days.
6. At the end of this time put them back in the crock or jar that you used to pickle them in, and store in a cool, dry place.
7. Serve them with white rice. (One ume per serving.)
Thursday, August 13, 2009

Bamboo Lattice from the Outside Again


bamboo lattice 1
Originally uploaded by touzanka
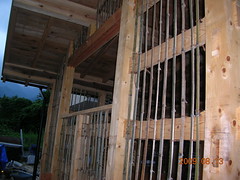
In this shot you can see the bamboo as well as the joints. Beautiful craftsmanship in these joints. This type of building uses the same type of construction as Horyuji near Nara. Those buildings have lasted for around 2,000 years. If I get just 10% of that in my building, I'll be dust long before it falls down.

Bamboo Lattice from the outside.


bamboo lattice 2
Originally uploaded by touzanka
You can see the bamboo tied on from the outside. The large open space is for a window.

Bamboo Lattice Top


bamboo lattice 3
Originally uploaded by touzanka
You can see a slender piece of bamboo running horizontally at the top. That is to secure the tops of the bamboo strips. That is done when the other horizontal pieces are added.

A detail shot of the verticle bamboo lattice


bamboo lattice detail
Originally uploaded by touzanka

Bamboo Lattice for Mud Walls


bamboo lattice inside
Originally uploaded by touzanka
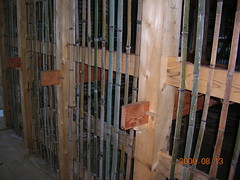
This is the verticle portion of the bamboo lattice work that we put in yesterday. There will be horizontal pieces tied in here, and the mud will be applied. It's almost a waste to cover the walls with mud. The bamboo is attractive.

It is easy to tie on, but it takes some precision cutting to make sure that the bamboo is the right length. It has to fit into the space from top to bottom, but you must also leave about a 3 centimeter gap at the bottom so that the bamboo doesn't bow outward with the weight of the mud.

Wednesday, August 05, 2009

Mud before mixing


mudbeforeJPG
Originally uploaded by touzanka
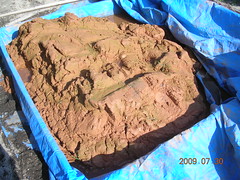
This is a shot of the mud for the walls before it has been mixed with water and straw. It is about as stiff as cookie dough. The little kids didn't sink into it as they stood on top, but I went straight to the bottom.

More mixing


mixmud
Originally uploaded by touzanka

Mixing the mud for the mud walls


mudfoot
Originally uploaded by touzanka
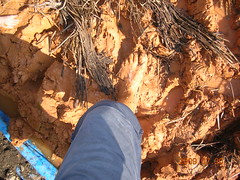
This is a shot of my foot in the mud and rice straw for the walls of the outbuilding. My feet are still stained with the color of the mud. The kids loved it, totally covered in mud. We mixed in enough water to make the mud the stiffness of bread dough.

splitting bamboo


splitbamboo
Originally uploaded by touzanka
This is a medium length pole. For the long ones we had to stand on top of the cab of the truck. Sometimes I wished I had a hardhat. Really trusted my partner

more bamboo


splitbamboo2
Originally uploaded by touzanka

split bamboo


splitbamboo3JPG
Originally uploaded by touzanka
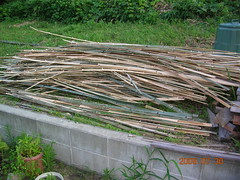
This photo is a shot of the pile of bamboo we split. It took most of the day to finish this lot. We had to haul some of the unsplit pieces we had cut out of the woods. Then we got to work on this around 10am. Finished around 4pm with a 1-hour lunch break. Once you get it down it's not so bad. This may or may not be enough for the who place.

Saturday, August 01, 2009

Yet more rain, rotten for farmers

Yet more rain today. This has gone on for weeks. The rainy season, which is usually over by now, has dragged on into the summer that is usually sunny and hot. That is bad news for the farmers. Soy beans look like bean sprouts. They've been planted up north, but they aren't growing leaves.

On a more personal note, I need to put up some mud walls, but can't get out with all the rain. If we put them up in this weather they'd never dry and succomb to gravity.

How to Make a "Doma" or Tamped Earth Floor

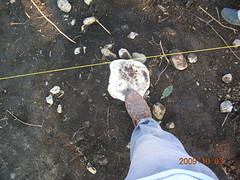
If you are looking for a cheap way to make a hard floor in a foyer, in a shed, or barn, you may want to consider a tamped earth floor, or what is called "tataki" or "douma" in Japanese. Japanese buildings have all historically been tamped earth or wooden flooring. Some temples have earth floors over huge areas. Kitchens and storage building floors were often made of the material that is cool in the summer and warm in the winter. Recently home builders have been returning the material for its aesthetic appeal, as well as the cost. The floors last for decades with moderately heavy use, are easy to repair if they crack, and can be made smooth or textured and decorated. They are inexpensive, because the materials are available nearly anywhere, and you can do all of the work. Finally, in the end the floors return to their natural condition, dirt.

First you need to consider how large an area you want to cover. If your foyer is three meters square, and you want a floor that is fifteen centimeters thick, then you will have to have about one and a half cubic meters of compacted earth and lime in the end product. I recommend at least fifteen centimeters of thickness for a strong floor. The thing is though that once this is packed down, it is about 1/3 the height of the original materials untamped. That means that you will need to start with about three times the amount of sand and lime to compact for your floor with the desired dimensions. In other words, you will need a little more than three cubic meters of sand and a one cubic meter of lime for your three meter square floor.

After you have calculated the amount of the simple materials you will need, you need to prepare the area that will serve as the base for the floor. The beauty of an earth floor is that you can easily put it right on top of what ever base you have, dirt or concrete. (You cannot make this on top of a wooden floor, because it will crack as the wood floor bends during tamping and after it dries.) If you are making a floor on a dirt base, then you need to also decide whether you want to have hard edges. For example, if you are making it so that your door will close, you need to make a frame that will define the dimensions of the floor so your door will shut. You can do that easily with a stout board cut to fit the width and desired height. If you are making a ramp into a storage facility where you may be rolling in your wheeled lawn tools, then you will need to dig a shallow ditch of about 10 centimeters in depth and the same in width, with the ramp ending at the middle of the ditch.

Mixing the earth mixture is easy enough if you are covering a rather small area, but if you are dealing with a large shed or indoor area, a backhoe may be useful for mixing. Mix the lime and dry river sand together, mixing it thoroughly. Do this right before you are ready to spread and tamp it, because the lime will start to react to any moisture immediately. You can then start mixing in water. You will need enough that the mixture is something like beach sand after the waves have retreated, damp, but water does not drip out when held in your hand. Start shoveling it onto the area to cover and start tamping it.

A tamper can take many forms. In Japan, a wooden mallet was used to tamp smaller areas, and a pine log with four long handles, like shovel handles, for two people to lift and drop was used for larger areas. Pine was used for its weight, but also for its auspicious characteristics in Japanese folklore. For those who are less interested in details or who have an area that is too much to be dealt with by hand, a gas powered tamper will work just as well. As the mixture is compacted, more should be added on top and tamped until it reaches the desired depth. What ever you do, you will have to use all of the mixture that you made that day. It will harden as a pile as the lime reacts with the water, and will not keep.

Once you have beaten it to the desired area and depth, you should decide how you want to finish it. If you want a rough finish, that is fine. The tamping should have left marks, and those may work. You may want to add different designs by stamping in a rope to make letters. Some people work in marbles, pretty rocks, or ceramic tiles. Or you may want to make it smooth. If you want a smooth finish, you will need to rub it with a mason's float or trowel. First sprinkle the area you can work on immediately with a little water from a brush. Try a small area first and work your way up. Then with the float, give a small area a beating, and start to rub it with the float. It works best if you lift the leading edge just slightly as you smooth the area back and forth and round and round. The fine, wetter particles will come to the top, and the coarser particles will be worked into the center of the floor. The fine particles with eventually make a smooth surface. If there are areas that are lower than others, fill it it with some of the left over mixture, and beat it into place with the float or trowel.

The floor will dry from the inside out, meaning that the outside will feel wetter when you touch it that it really is on the inside, but you shouldn't let it dry too fast. You will have to avoid walking on it for some time. If you can give it a month, that would be best. If you live in a dry area, cover the floor with a grass mat and sprinkle it with water daily, just so keep it from drying so fast that it gets flaky or crumbly. If you live in a damp climate, like Japan, you will need to keep areas under a roof damp, and areas outside from washing away if there is, for example, a water drain coming off of the roof. After about a month you can use it normally.

As the years pass your tamped earth floor may develop cracks or wear out in spots. Just mix up a little soil, lime and water and pound it down, let it dry, and it will be good as new. If you sprinkle it with water from time to time, it will thank you, too, especially in dry indoor areas. Some people in some areas of the world put oil on their dirt floors. You may want to try that, too, but choose a non-petroleum oil with a smell that you can live with, especially if it will be in your living area.

Earthen floors have been used all over the world for millennia in all kinds of spaces. There are different details in the mixtures. Some places even mix ox blood into their mixture, but what they all have in common is that they use naturally occurring materials to make low maintenance floors that live and breath with you and the rest of your space. They are easy to make, even the kids can be involved in the process. (Keep them away from the lime!) They are beautiful and soulful to live with.

Thursday, July 30, 2009

split bamboo and mix mud


bamboo splitter
Originally uploaded by touzanka
Spent the day splitting bamboo and mixing mud for the mud walls. This is what you split bamboo with. You can probably guess how you use it.

Wednesday, July 29, 2009

Yet more rain.

More rain today, but had to go into work. Doesn't look like I'm going to get to the fields today. Tomorrow is a bamboo hauling day.

Monday, July 27, 2009

Heavy steady rain today

Heavy steady rain this morning. Won't go out to the fields today. Reading about saving tomato seeds in 2009 Farmer's Almanac. Think it may be prudent to start saving seeds. GM0's and "terminator genes" pose a threat to farmers like me and to plant life specifically.

Tuesday, July 21, 2009

Bamboo for Lattice Work in Mud Walls

Went out to cut bamboo for the walls that we are going to put in the outbuilding. We needed about 80 pieces from between 5 to 2 meters long. The bamboo we cut was on some property next to the home of the carpenter that his helping us build the building, and we got their permission to cut some. We tried to thin out the grove rather than cut everything in one patch. A person should be able to walk through a healthy bamboo stand with an open umbrella, and so with that in mind we cut the plants that were weak and too close to other healthy plants. We loaded it onto the truck, and drove it home, but it was quite a challenge. We took three loads back, and the leaf springs on the truck were flat.

I thought we would see more beasties. As it turned out we only saw one very big hornet. It was large enough that the beating of its wings blew dried out bamboo leaves as it passed close to the ground. Major insect.

Putting in A Beaten Earth Floor

We are in the process of building our out-building. Yesterday we put in our beaten earth floor. Here is how one is made the Japanese way. I guess that some places use ox blood in it. We did nothing that extraordinary.

We have an area about 50 square meters for which we wanted a floor to store our small tractor, other farm implements, and harvest through the winter. We have chosen to build as close to a traditional Japanese "kura" as our time and effort will allow. That means that instead of a tile roof with dirt underneath as an insulator, we are using galvanized metal with a foam insulator underneath. And instead of two layers of bamboo lattice in the walls, we will use one layer of lattice, making the walls about half as thick as the 40cm walls on the real deal.  Yesterday we put in the beaten earth floor, it was quite a workout, but made considerably easier to do with experienced help and modern equipment.

We started by digging a 30cm wide and about 10cm deep ditch 30cm from the where the wall will start. The ditch will serve as a deep spot to keep the floor from slipping  outward. There is also a ramp area in front of the door that will be kept relatively dry with the overhang on the front of the building, for which we dug a deeper ditch, about 30cm deep. We put a wooden frame around the building, just within the ditch. Then we started mixing earth and plaster. We used about three quarters alluvial sand to one quarter plaster with a small backhoe. We mixed a total of about 5 metric tons of earth, and started from the outside, shoveling in the sand and beating it down with hardwood mallets. They were short handled, and the business end was long and rounded. The entire mallet was about 50cm long, and the striking surface was about 30cm of that. We were working on building up about 15cm of beaten flooring, which required about three layers of earth. My guess is that loose earth compresses to about 1/3 of its original depth after beating. The outside floor required hand tamping, because it was laid around the beams of the building and inside the wooden frame. We used two gasoline powered tampers to compress the larger areas inside. The outside floor was nicely polished with a mason's trowel. One of the masons there to help us with the project kindly showed me the method for flattening and smoothing the surface. You must beat it to smooth out the bumps, and then sort of massage it with the trowel. This works the larger particles of sand in and brings the finer particles out, which smooths the floor.

We started working on the floor at around 8 in the morning and finished cleaning up and loading the equipment back on the trucks at around 6. Several of our friends came to help, and were happy to have had the experience. They are also working on developing their homesteads, and one family that came to help is in the process of building their own home with wood working studio and extra sleeping areas to come. I'm sure we will use our hard-earned experience with their projects, too.

It was hard work, and I am sore today from swinging those mallets, but we enjoyed the work and companionship, and now we have an earthen floor that will return to the earth, hopefully long after I have.

Thursday, July 16, 2009

The Cats in Summer

Couple photos of the cats.

Chikens thriving

After a bit of a rough start, the chickens are thriving. First we had the incident with the older birds pecking the younger ones. We segregated the little ones into an old doghouse. They are well, and then one of the cats got through two layers of fence to grab one of the birds, injuring the chicken slightly. We brought both little ones in and warmed them up in a box with a light attached, and they are now happy and health. We have added another layer of protection to the sides, especially to keep the cats at bay. They are still interested, but can't get at the birds.

Now we are enjoying watching their growth. The little ones are getting their combs, and the older ones are getting wattles.

Tuesday, July 14, 2009

Students want to diet

My students, most of whom are first-year women, often comment that they need or want to diet in order to lose weight. I tell them to eat well. I don't just mean vast quantities, nor do I mean just expensive food. I mean eat good food that is good for you.

They are poor college students. All the better my dears. They don't have much money, so they need to spend it on good food. By that I mean chemical free, locally grown, high quality grains, vegetables, fruits, and meats if they're into them. Let me take meat for example. We are close to some of the highest quality beef grown in the country, Matsuzaka beef. It is beautiful and a meat eating experience like no other (if you're into meat), but it is expensive as blazes. No student could afford very much or very often. That would be the way to go. If they limit themselves to quality food, they will get less in grams, but more in satisfaction and health. Brown rice costs more than white (for reasons I can't explain), and chemical free is even more costly. Chemical free fruits and vegies are hard to find, but available at a higher cost. Everything will be less affordable when buying quality, but will satisfy and less is more when you want to lose weight in a healthy way.

If they eat this way, they can also be healthier than if they go for quantity rather than quality. When the buy for quantity, they get large loaves of white bread or white rice, lots of sugar and chemical additives, as well as more salt than they need.  I hear students say that they had instant noodles for breakfast. They will crash long before lunch, they will binge eat large quantities of crap, and then then they will feel bad. Why bother? Have some brown rice in your rice cooker and a kettle the stove for a cup of quality instant soup (not the variety that they sell at supermarkets), and a cucumber, and there is a breakfast that will stay with you until lunch.

Since many of my students are women, so they want to eat sweets (a phenomenon that I was not aware of in the US) often in the form of cake. I tell them not to bother with hormone tainted cream cakes and white sugar when confections made with tofu cream and raw sugar are available at a few good cafes around the area. Granted, they won't be filling up on cake at the prices that quality sweets cost, but they will enjoy themselves and get something good for themselves in the process.

Don't know how many students take my advice, but if they are happy with themselves and healthier, we'll all benefit.


Thursday, June 04, 2009

Sinus infections and allergies

An acquaintance is suffering from allergies and sinus infections, and I wanted to scream at them to change their eating habits. It happens to millions every year, and it used to happen to me. The weather changes; the flowers bloom and their heads swell to twice their normal dimensions. It would happen to me, too. To the extent that I am sure that sooner or later, I would have died either in the spring or the fall due, at least in part, to my conflicted breathing situation. The ironic part is that those are my favorite seasons, and I had come to dread them.

If you are suffering now from some kind of seasonal health issues, you don't have to. Of course see a physician for sinus infections. They are nasty. And then do this.
  • Stop taking milk, yoghurt, ice-cream and other dairy products


  • Switch from white bread to wholemeal and also begin to take brown rice, wholemeal noodles and other wholemeal products


  • Eliminate red meat


  • Eliminate white sugar and products containing sugar


  • Eat lots more vegetables and fruits
  • Eat less quantity overall all the time
  • Eat better quality food
 Watch the pounds disappear, and your health return. It may take a year to notice any results, and it is especially important to continue these eating habits when you are not being dogged by these problems. Like in the summer and the dead of winter. It is tempting to think that the problems have subsided, when really they are getting their energy to reemerge from the food you build your body with in the problem-free times.

Wednesday, June 03, 2009

Ageing Japan's fertility rate up but population falls | Reuters

Japan's fertility rate up by 0.03 points, below the estimated 2.07 needed to keep the population at current levels. There were 51,300 more deaths than births.

Can't help but think this is a trend that the whole world should be reflecting, lowering human impact on an already over-burdened earth. Current economic dependencies on ever-increasing levels of consumption of cheap junk have to change to quality, long-lasting necessities.


There's lots of gloom and doom reportage here, like the phrase, "The low birth rate threatens to squeeze the economy by shrinking the labour force, which could weigh in on its GDP and leave fewer workers to support a growing number of pensioners." The paradigm here is that we need more and more workers churning out more and more crap to support old people. Why not fewer, more highly skilled workers turning out quality goods, and earning more to support pensioners. Either one is equally imaginable, but the former is just easier to accomplish. Business as usual laziness will accomplish that.


Ageing Japan's fertility rate up but population falls | Reuters

Tuesday, June 02, 2009

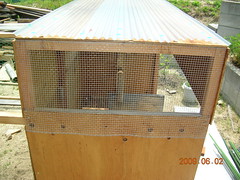
chicken coop door from outside

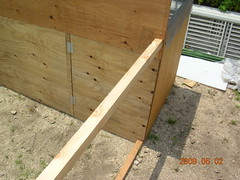
This is a shot of the front door that will lead to the fenced-in outdoor area where the chickens can move around outside. All of this will need to be weather proofed and painted nicely. My son has promised to do the art work.

chicken coop roof


chicken coop roof
Originally uploaded by touzanka
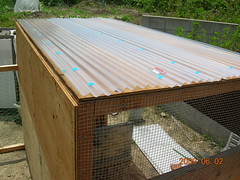
Another shot of the roof of the coop.

chicken coop door from inside

This is a shot of the door from the inside. I may need to reinforce the top of the door later.

chicken coop side


chicken coop side
Originally uploaded by touzanka
I used this wire mesh on the sides to keep the birds cooler on hot summer nights. In the winter I'll cover those over with an opaque plastic sheet. You can also see the plastic roof that I put on the top.

Sunday, May 24, 2009

Our Daily Bread: A movie review

"Our Daily Bread" had been staring me at the DVD rental shop for months, and I kept rejecting in favor of something else, because I had a feeling I knew what would come, a full on indictment of industrial food production. I rented it Friday, and that is what I got. A kind of Koyaanisqatsi: Life Out of Balance experience completely about the industry that manufactures much of the food we eat without the cool Philip Glass music. In fact there is no music at all; the only speaking one can hear is the very quiet speech of workers from a distance, and there is little other background noise other than machine or animal sounds.

The blurb for the movie says:

OUR DAILY BREAD is a wide-screen tableau of a feast which isn’t always easy to digest - and in which we all take part. A pure, meticulous and high-end film experience that enables the audience to form their own ideas.

We may have been enabled to form our own ideas, but the images left me with very little wiggle room. My conclusion is that if the results of the industry portrayed in this film were my only source of nutrition, there would be no need for my continued existence. Fortunately I have other sources, and am struggling to create my own, so I still have a place here.

The food industry degrades the existence of everyone that comes in touch with it. There is often a disclaimer at the end of movies, something to the effect of "No animals were harmed in the making of this movie." My son chuckled that the disclaimer at the end of this one should read something like, "No animals were unharmed in the making of this movie." From birth the babies were raised to live the most miserable lives imaginable, only to be killed in the end so their bodies could be consumed by humans. The humans involved faired only slightly better, the odds being good that their lives would not end at the hands of another person, and less likely that their bodies would be consumed by canibals. Thier working lives were either as drones serving the mutant plant food, or right out of the first ring of circle 7 of Hell in the river of blood to which we are all doomed if Dante was right. This Hell in Phlegethon is Dante's name for the river of hot blood that serves as the first ring where spillers of blood themselves, violent offenders are submerged to a level corresponding to their guilt.

My convictions about the food industry and my choises were reenforced, and it was ironic that today a friend questioned my decision not to feed my children meat, as they ate spaghetti with "meat sauce," whatever that may be. I wanted to tell them about the film, but didn't think it would be a good idea to ruin their meals. I just said that I don't want to feed my kids the industrial food products any more than I want to eat it myself. 

Thursday, May 21, 2009

roof and roost from front


roof and roost from front
Originally uploaded by touzanka
This is a shot of the roost and roof from the front. It is getting heavier all the time, so I hope it is still mobile in the end.

roost


roost
Originally uploaded by touzanka
The roost. Hoping it will be long enough for three birds to hang out on.

coop roof


coop roof
Originally uploaded by touzanka
This is a shot of the roof. I made it a kind of lid that will fit neatly on top so as not to blow away in the early spring winds, and to allow it to be lifted off for added ventilation in the hot summer.

Tuesday, May 12, 2009

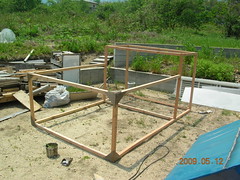
Assembled frame front


frame1
Originally uploaded by touzanka
This is a photo of the assembled frame from the front.

This is all I could do with the time that I had today. Gotta work sometime. I will continue to photograph the progress here and keep updating this project.

Assembled frame 2


frame2
Originally uploaded by touzanka
This is a photo of the assembled frame, with triangular supports on the front end of the play area.