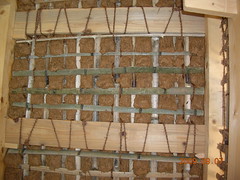
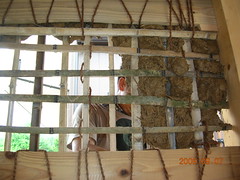
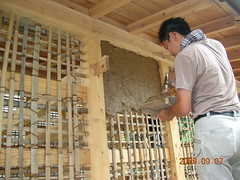
The wall on the right is the covered wall, and that on the left is what a section looks like before it's covered from the inside. The gap at the bottom is a window.
Saturday, September 12, 2009
innnerwall 2
You can see the difference in the color of the mud. The brown on the left is the older mud. That on the right is the newer mud.
More on mud walls
Since the outside half of our mud walls was up dry, thanks to the terrific weather, we put up the inside half on Thursday. Again with the help of seven other hard working friends, we got the job done in one day. Thursday's work went smoother for three of reasons, we had more practice, the outside wall gave us something to push against, and the new mud was easier to apply.
We started at 9:30 by mixing up the little bit of mud we had left, and uncovering the new load of mud we received for the remainder of the walls. The old mud had gotten harder, because the weather had been unusually dry and windy. The new mud, having been covered with plastic, was ready to go.
The inside walls went up much easier than the first time. The first reason was that all of us had experience at it. Also, since the outside wall was already done and the big gaps in the bamboo lattice were filled up, the new mud went on much smoother. Finally, the straw in the new mud had been chopped up finer and had rotted longer, so it was easier to spread. The smell was quite a bit stronger, too.
One other interesting feature of the different mud is the color. The mud we used on the outside of the building was from a nearby source, and is tan in color. The newer mud is chocolate mousse color. You can see that in the photos.
We will cover the walls once more with a thin layer of mud with a higher sand content for the sake of appearance and making it varmint proof. Now there are lots of gaps in it as a result of the mud drying. Sandier mud won't crack as much.
Tuesday, September 08, 2009
Mud supply
Actually, this isn't enough mud, and to finish up the inside walls, we are going to have to find some to buy. There aren't many, but people do still make mud for wall commercially.
Mud and straw walls: Putting the mud on the latice work
There are pockets of Japan where you can still see what it may have been like to live here as a common person 150 or 200 years ago, and those areas are pretty much anywhere you go. You don't have to go anywhere special, just walk around enough to find those places.
Some ways to you can tell you have found that kind of place is by narrow roads. Roads didn't have to be very wide for people to pass, or a horse, or a pull cart. Thatched roofs, or more likely thatched roofs covered with galvanized steel sheeting is another. My favorite old structures have been kura, or store houses.
Kura vary in size, but they all have very thick walls, which are white on the outside, with thick metal doors and windows. They are often adorned with carved plaster reliefs of storks, tortoises, or some other auspicious animals. And aside from the wooden frame, and steel doors, they are almost entirely mud and straw.
I always admired those structures and wanted one, but thought I would have to buy and old one. I never thought I would be building my own. It has been quite an adventure.
Yesterday we put up the mud on the bamboo lattice walls. The mud has been sitting in our back yard, with the rice straw gradually rotting and forming a fine fiber net that will hold the mud together for decades, and then when my kids or grandkids want to redo the walls, all they have to do is pull down the old mud, mix it with a little new mud and straw, and put it up again. 100% recyclable.
We started at about 9am, wading through the stinking mud to mix it up and adjust the consistency. The straw rots and smells like a swamp, which is really what it was. The bacteria comes from the straw, and is the same strain that helps turn soy beans into natto.
At around 10 we started applying the mud to the walls. Your loader loads a football sized glob onto your pallet, and you throw it into place and spread it out as evenly as possible with your trowel. Then you reach down for another glob that your loader serves up to you with a miniature pitchfork, especially designed for the purpose.
You keep that up, working your way down the wall, until you reach the earthen floor, and then move on to the next section. People reported various symptoms of overworked muscles, twitching biceps, shoulders that wouldn't raise anymore, hands that couldn't grip a trowel or pallet. The smell you get used to.
Traditionally you started applying mud from the inside, then wait a few days for the mud to dry a little, and then apply the outside wall. Our kura has relatively thick horizontal beams on the inside, so we used them as a shelf for the mud to sit on and started from the outside. We will wait for a few days and the apply mud for the inside.
It was a thoroughly enjoyable process, mostly because of the people who gathered to help us out. There were ten people in total who contributed their time and labor, which makes the building all the more dear. They all came for different reasons, mostly to help us or to find out how to make a mud-walled building.
That kind of communal work party is called a yui, 結い、in Japanese, and were common when people planted, harvested or built buildings. My guess is that in the future we'll have more of them, because the people who came to help all expressed a desire to have their own kura, with a couple of people saying they wanted a home or business build that way.

Subscribe to:
Comments (Atom)


